The-Dwarf
Guest
In this guide I'm going to teach you how to make a sig using GIMP.
GIMP is free and you can download it here
I'm going to start off simple.
SIG 1. - The starter
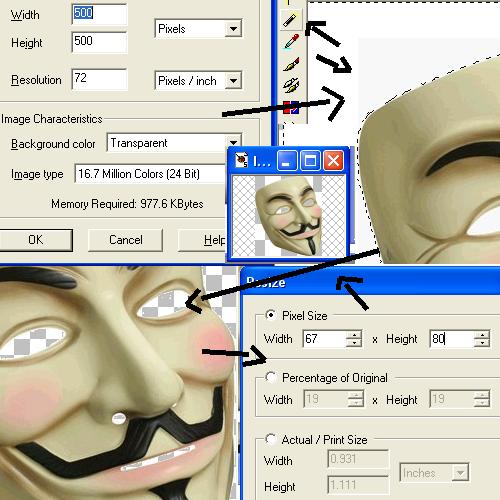
Step 1. - Picking the size of the sig Go to file -> New... -> and choose Width 550 px and Height 80 px
Step 2. Picking a background color The background may be white, if not then use the bucket fill tool and make it white.
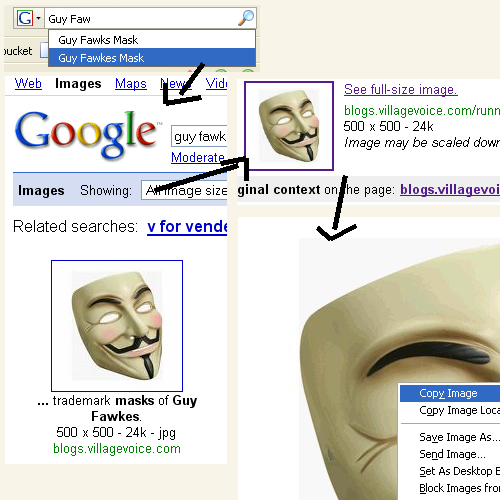
Step 3. - Picking a picture To input a picture you'll have to save it to your pictures. Then you drag the picture from'Pictures' into the sig. If you got some background to get rid of you can use the magic wand. To take away alot of the background on the same time hold in 'SHIFT' while pressing the spots you want to go away. If you want to move the picture use the move tool (4 arrows)
I'm using

and

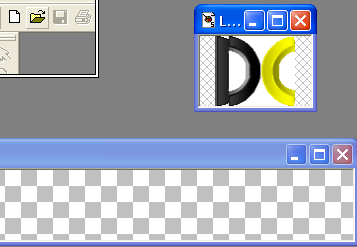
Step 4. - Writing the text To type a text you'll have to use the text tool. I was making this sig for 'sugarwater' so I'm typing her name on it. I'm using the 'Jokerman' font. I did pick blue colors and size 40. Now it should be like this:

Then below I typed: 'Makes Everything Sweeter' (using the Jokerman font, size 20). Now it should be like this:

Now it should be useable.
SIG 2. - More Background - You all know step one so staright to step 2.
Step 2. - Making a background In my sig I did it a bit harder. You need a black background. Then you use the paintbrush tool -> pick the confetti brush -> pick white color -> opacity: 75 -> Now use the brush and make most of the background gray.
Now it looks like this:

Step 3. - Picking colors In my sig I did use red so I'm showing you how to make red. Go to colors -> Colorize... -> First set 'Saturation:' to 100, then if your going with red you need to set 'Hue:' to 360. Now I did use a dark red color so I go below 0 in 'Brightness'
Now it should look like this:

Step 4. - Putting in the picture Now you all did this before but I'm saying it anyways. Save the picture you want to use to 'Pictures', Now drag the picture from 'Pictures' into the sig. To take away the background you can use the magic wand. To move the picture you'll have to use the 'Move Tool' (you can't use it if the mouse is also. Only the 4 arrows are aloved to be seen if you want to move it). If the picture is to big you can scale it by going to 'Layer' -> 'Scale Layer'. If you have a ghost or something you can adjust the opacity in the 'Layers' window.
Now it should look like this:

Step 5. - Adding the text Now as I wanted a text that was cool and could be seen well I did pick the 'Milano Let Ultra-Light'. So it could be seen better I did pick the white color. To make the letters going from top left to bottom right use the 'Rotate Tool'.
Now it should look like this:

NOTE:
I suggest that you will not write tribe names or worlds as people change tribes and join/leave worlds.
To post a sig here on the forum you'll have to upload it on the internet using sites like Tinypic
Please show us some of your work and don't be afraid of pointing something out in my guide. My first one so...
Enjoy
The-Dwarf
GIMP is free and you can download it here
I'm going to start off simple.
SIG 1. - The starter
Step 1. - Picking the size of the sig Go to file -> New... -> and choose Width 550 px and Height 80 px
Step 2. Picking a background color The background may be white, if not then use the bucket fill tool and make it white.
Step 3. - Picking a picture To input a picture you'll have to save it to your pictures. Then you drag the picture from'Pictures' into the sig. If you got some background to get rid of you can use the magic wand. To take away alot of the background on the same time hold in 'SHIFT' while pressing the spots you want to go away. If you want to move the picture use the move tool (4 arrows)
I'm using
and
Step 4. - Writing the text To type a text you'll have to use the text tool. I was making this sig for 'sugarwater' so I'm typing her name on it. I'm using the 'Jokerman' font. I did pick blue colors and size 40. Now it should be like this:
Then below I typed: 'Makes Everything Sweeter' (using the Jokerman font, size 20). Now it should be like this:
Now it should be useable.
SIG 2. - More Background - You all know step one so staright to step 2.
Step 2. - Making a background In my sig I did it a bit harder. You need a black background. Then you use the paintbrush tool -> pick the confetti brush -> pick white color -> opacity: 75 -> Now use the brush and make most of the background gray.
Now it looks like this:
Step 3. - Picking colors In my sig I did use red so I'm showing you how to make red. Go to colors -> Colorize... -> First set 'Saturation:' to 100, then if your going with red you need to set 'Hue:' to 360. Now I did use a dark red color so I go below 0 in 'Brightness'
Now it should look like this:
Step 4. - Putting in the picture Now you all did this before but I'm saying it anyways. Save the picture you want to use to 'Pictures', Now drag the picture from 'Pictures' into the sig. To take away the background you can use the magic wand. To move the picture you'll have to use the 'Move Tool' (you can't use it if the mouse is also. Only the 4 arrows are aloved to be seen if you want to move it). If the picture is to big you can scale it by going to 'Layer' -> 'Scale Layer'. If you have a ghost or something you can adjust the opacity in the 'Layers' window.
Now it should look like this:
Step 5. - Adding the text Now as I wanted a text that was cool and could be seen well I did pick the 'Milano Let Ultra-Light'. So it could be seen better I did pick the white color. To make the letters going from top left to bottom right use the 'Rotate Tool'.
Now it should look like this:
NOTE:
I suggest that you will not write tribe names or worlds as people change tribes and join/leave worlds.
To post a sig here on the forum you'll have to upload it on the internet using sites like Tinypic
Please show us some of your work and don't be afraid of pointing something out in my guide. My first one so...
Enjoy
The-Dwarf
Last edited:
 arkened Mask], F5, [Click:500x500 Canvas], F3, F7, [Click], [Click